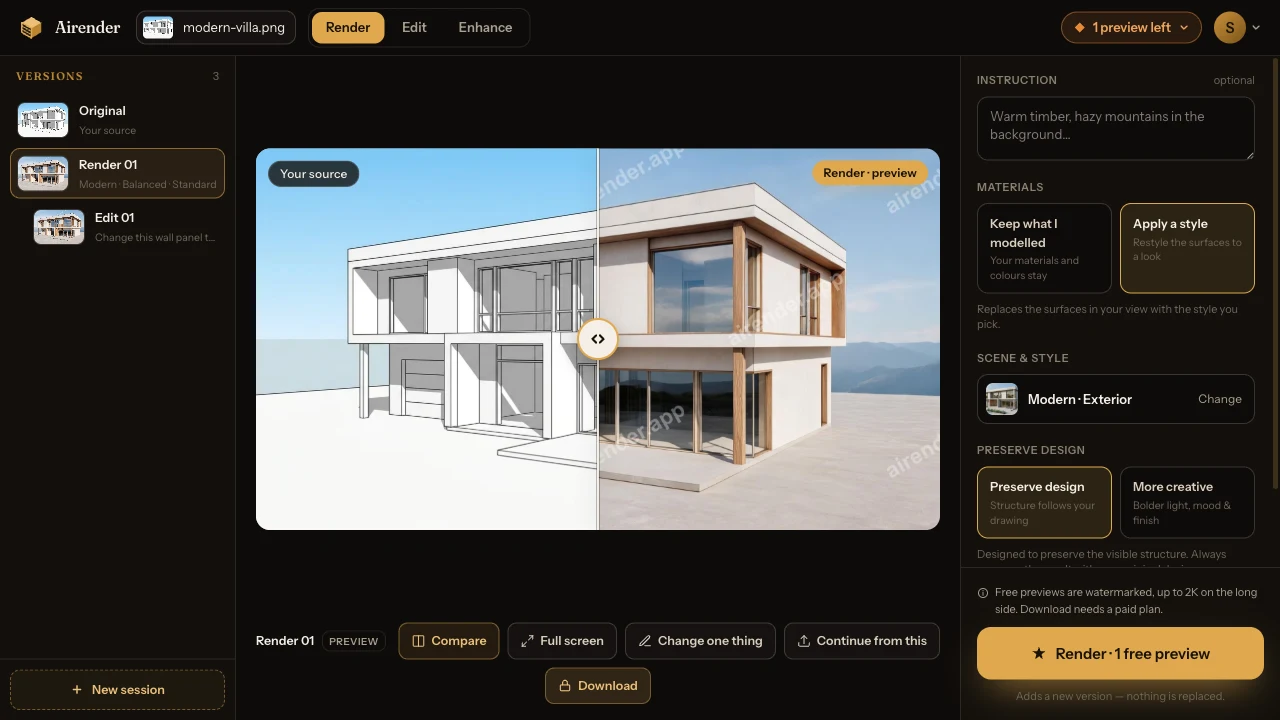
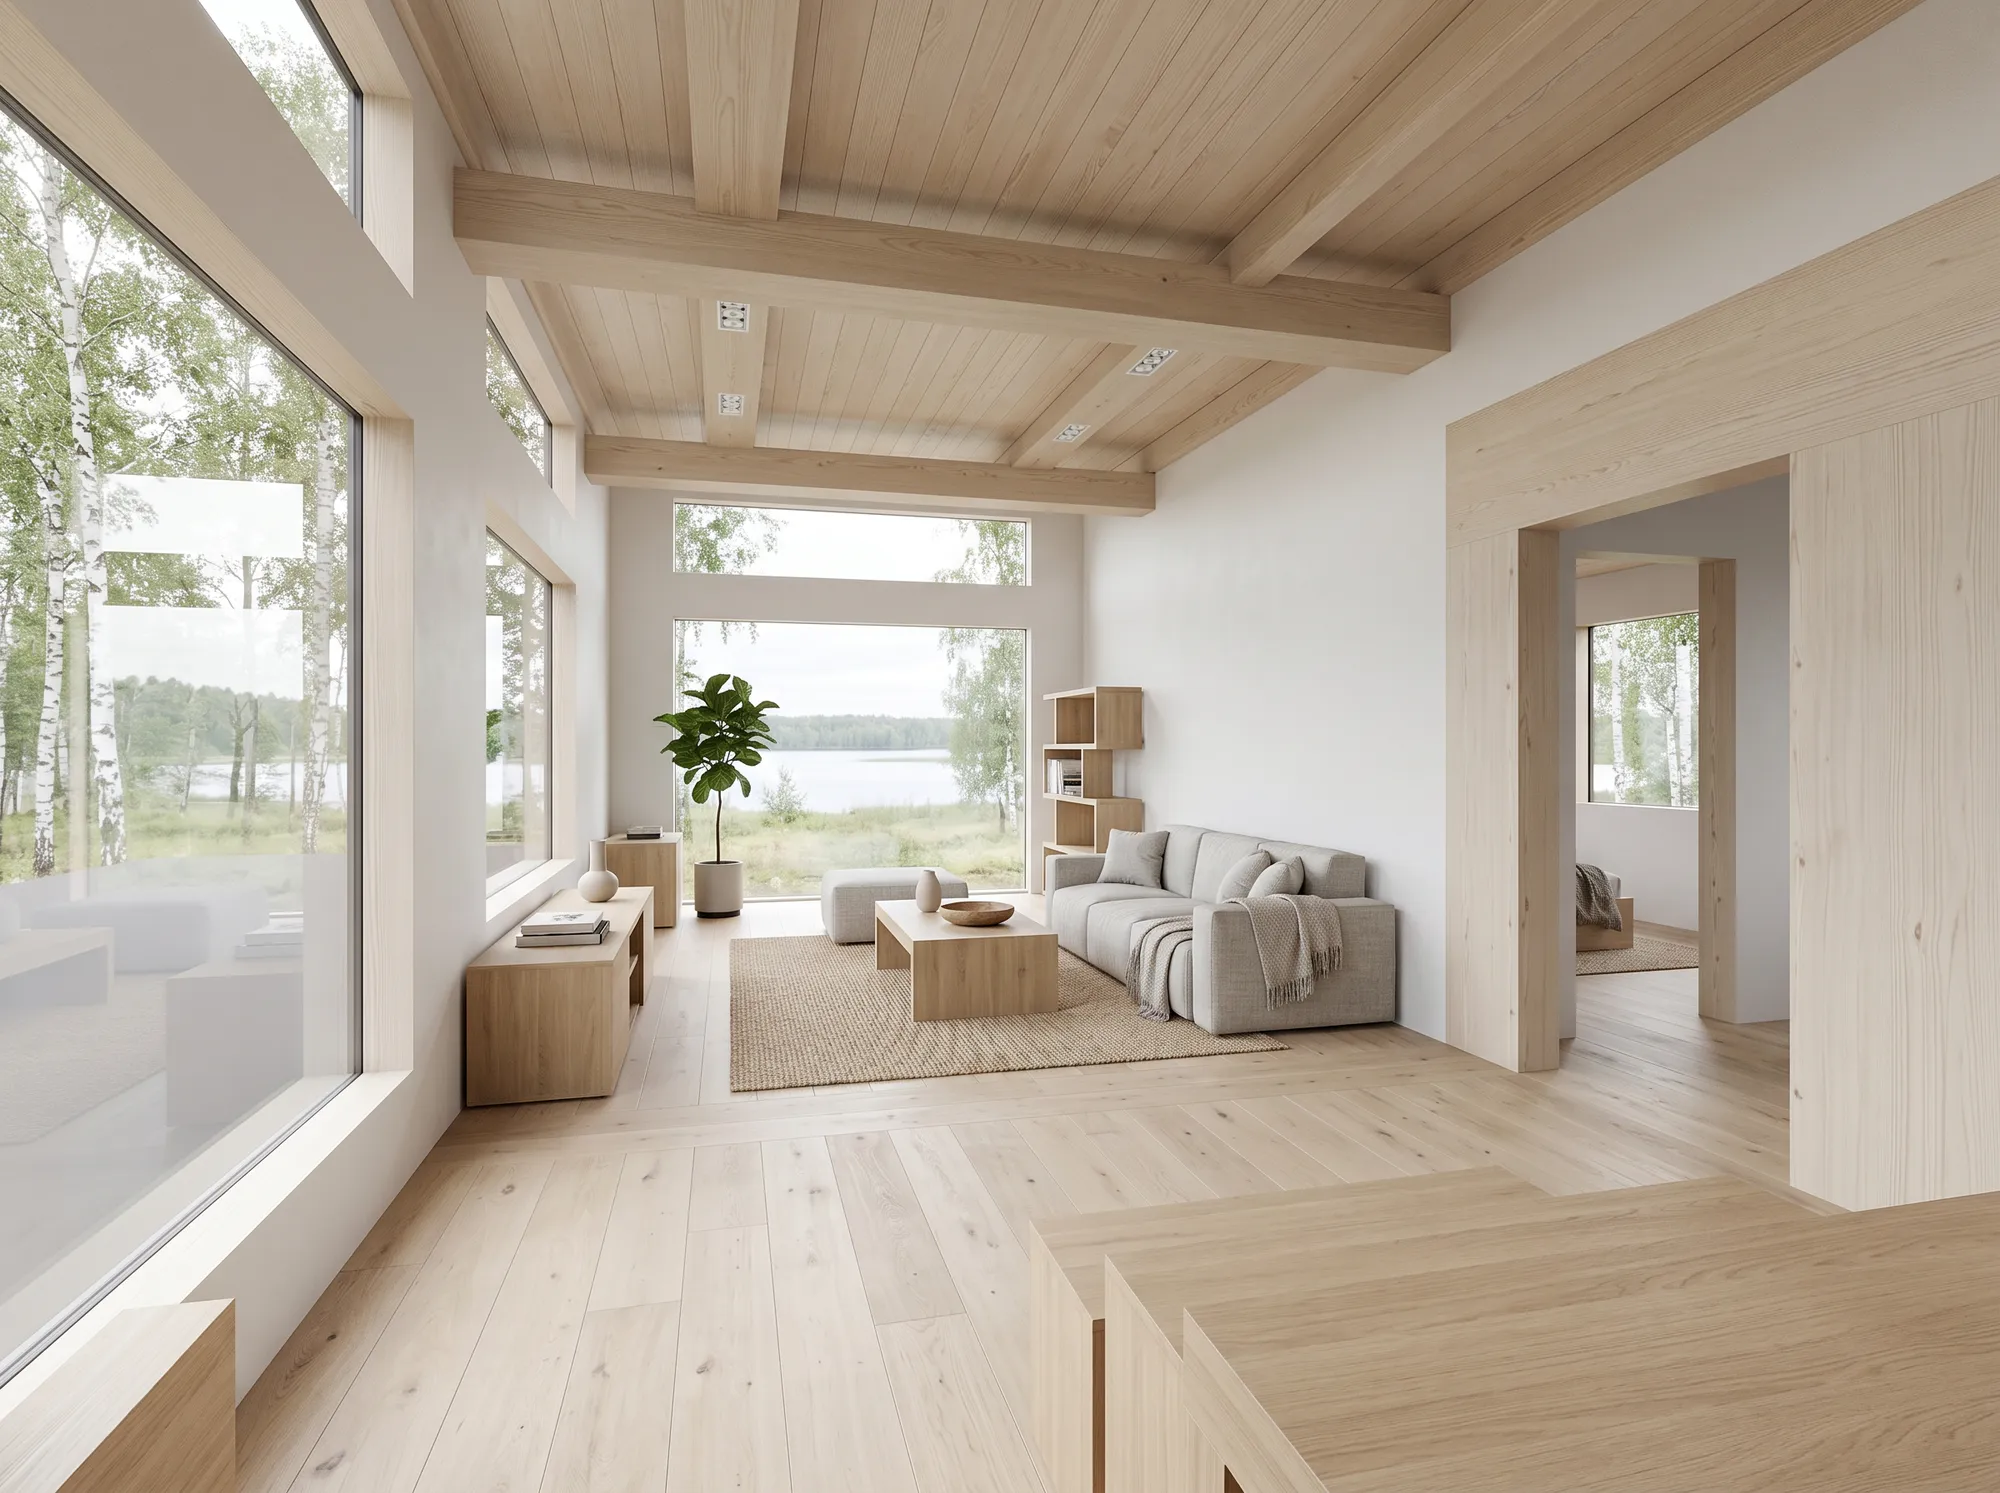
Interior Rendering

Turn your 3D interior design into a client-ready render.

Upload the perspective you exported from SketchUp, Revit, Rhino, 3ds Max or Blender. You get a photoreal image designed to hold the room you designed and the finishes you chose — and you can change one surface of it afterwards. Not the .skp, .rvt or .3dm file, and nothing to install.

No image handy? Try a sample
Free · no credit card · 3 previews · we don’t train on your uploads
Designed to preserve your geometry — compare with your original
Example render — AI renderExample render — inputSketchUp interior viewAirender
Example · drag to compare

A real SketchUp interior, rendered through this product. Source model: Akrisht Pandey · CC BY 3.0 · Wikimedia Commons

Preserve your design

It renders the room you designed. Here is one, and here is what it got wrong.

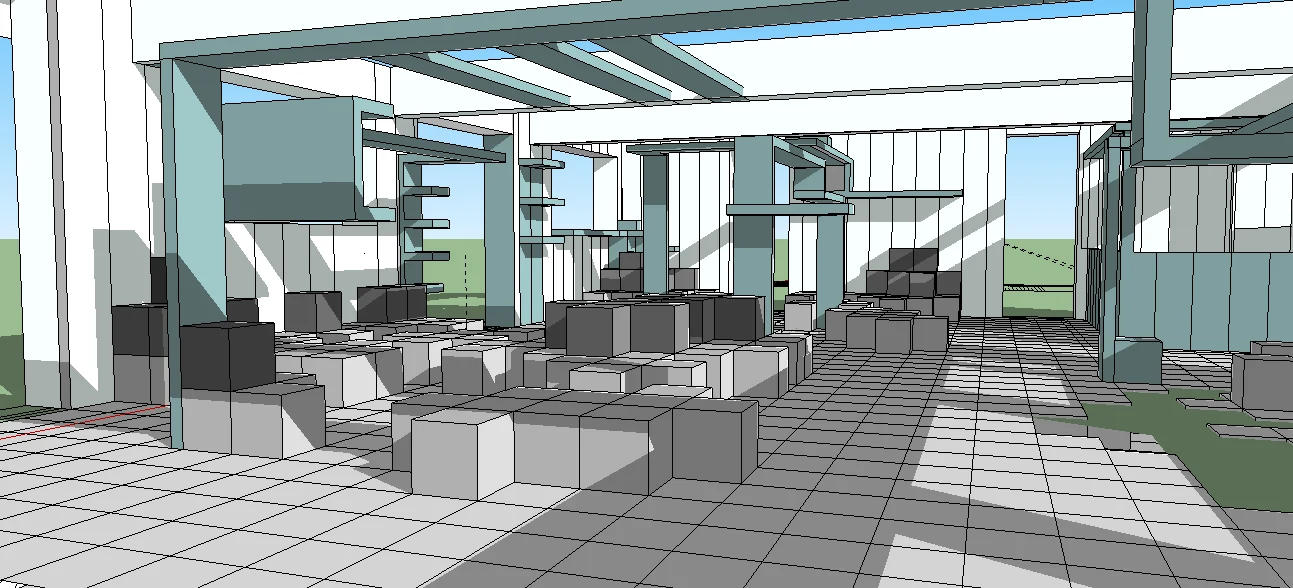
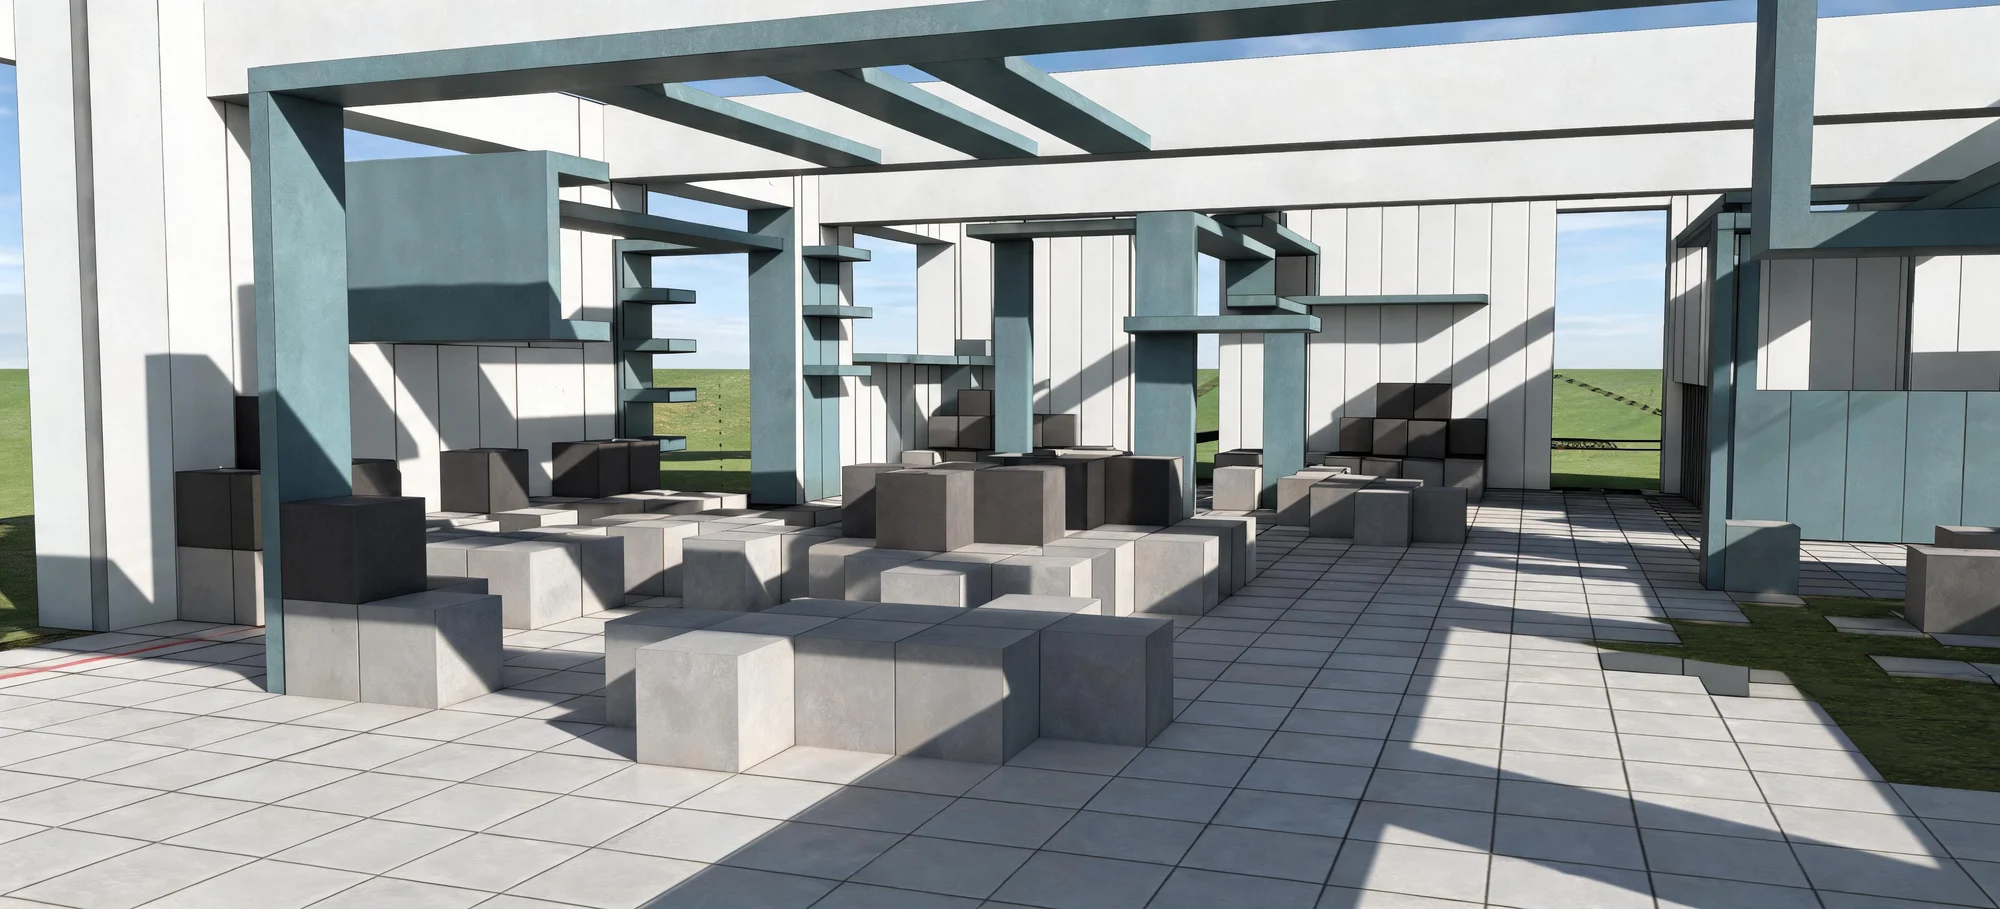
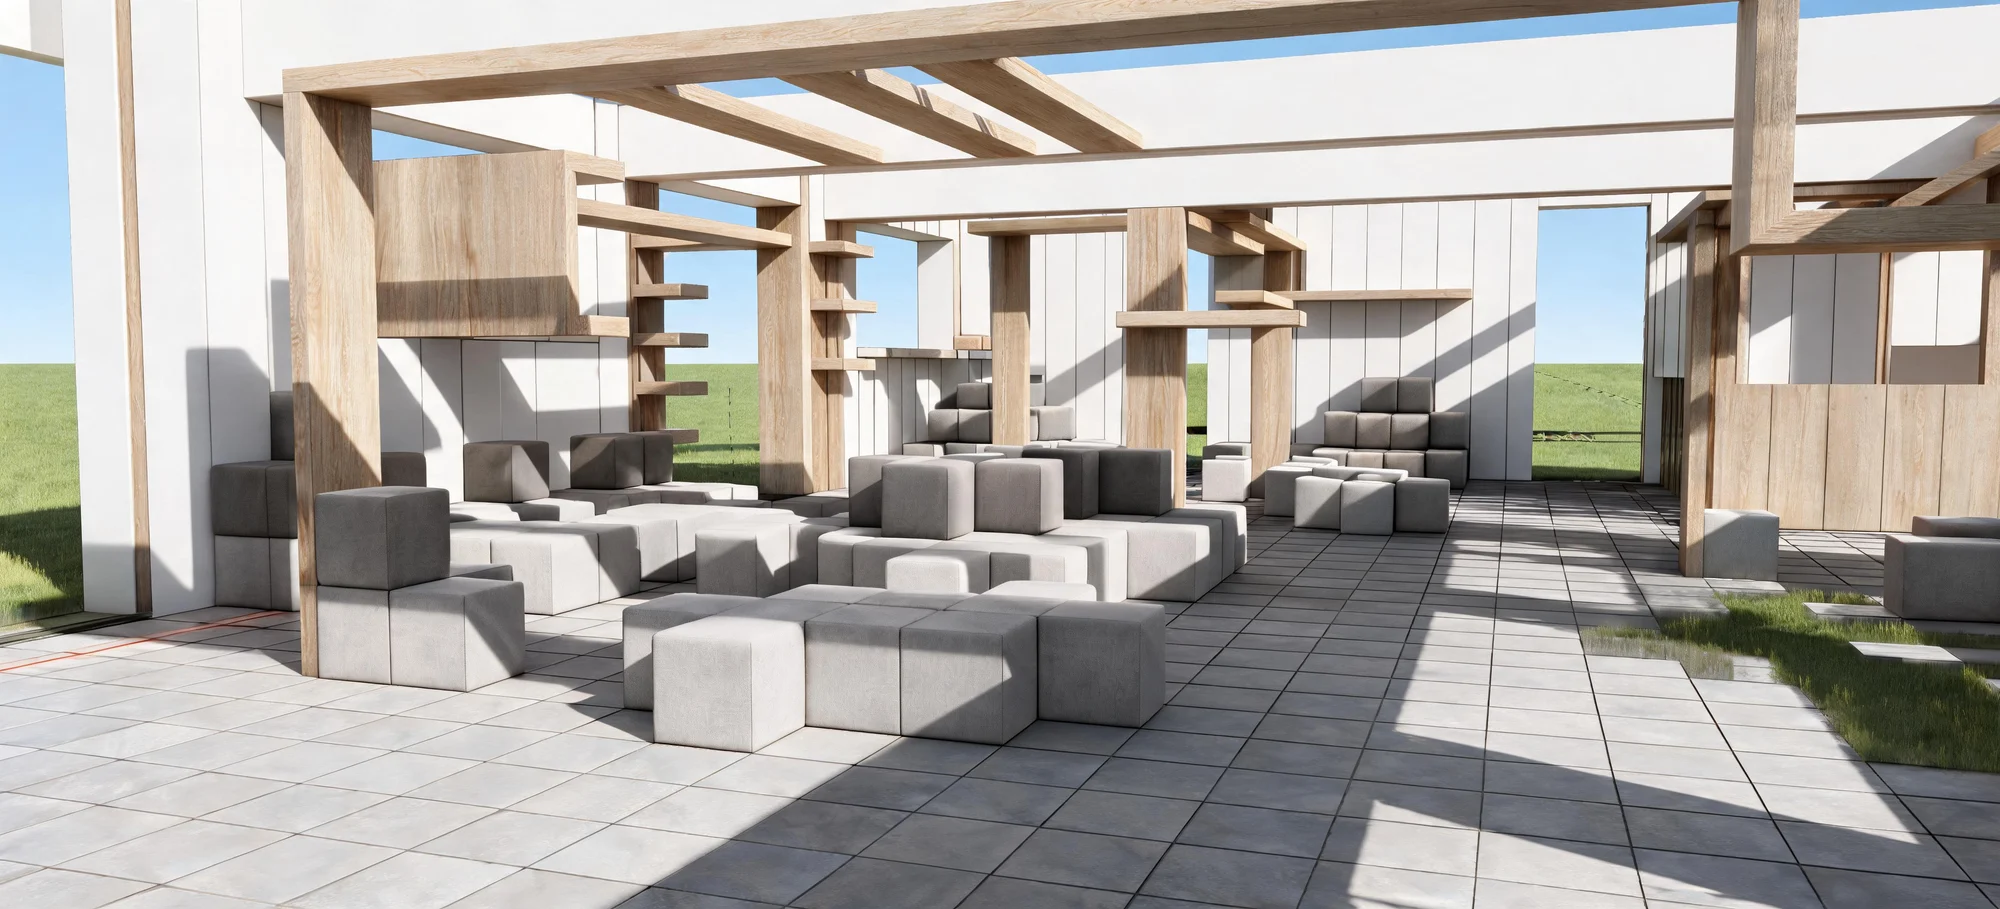
A student canteen scheme modelled in SketchUp, run through the product you are about to use — Interior, Keep what I modelled, Preserve design — and not retouched. Drag the seam and check the beam grid, the columns, the openings and where the furniture sits.

A SketchUp interior view of a canteen, rendered photorealistically with the layout and camera held — AI renderA SketchUp interior view of a canteen, rendered photorealistically with the layout and camera held — inputSketchUp interior viewAirender

Source model: Akrisht Pandey · CC BY 3.0 · Wikimedia Commons

What held
  • The beam grid and the column positions
  • Wall panels, glazing and the openings through to outside
  • The furniture layout, including how the blocks are stacked
  • The camera, and the framing of the whole view
What changed, as asked
  • Surfaces became real concrete, plaster and glass
  • Daylight, contact shadows and reflections
  • Photographic depth and material grain

And what it got wrong

  • The floor came back at a coarser paving module than the model — the joints run the same way and lie in the same plane, but there are fewer of them.
  • The red SketchUp axis line on the floor at the left was rendered as a red stripe painted on the slab. It is meant to be ignored as software UI; here it was not. Turn axes and guides off before you capture.

Designed to preserve the visible structure. Always compare the result with your original design. That is the honest ceiling of the claim.

Preserve design

Asks for the layout, openings, proportions and camera to be held while materials, lighting and realism change. The setting this page’s example ran on, and the one a session started from here opens on.

More creative

Asks only for the overall composition to stay recognisable, and lets materials, detailing and surroundings be reinterpreted more freely.

Faithful, under Advanced

The stricter end of the same slider: strictly preserve the geometry, upgrade only materials, lighting and realism. Still an instruction, not a lock.

Keep or change materials

You already specified the finishes. Decide whether the render is allowed to.
The same interior, the same Preserve design setting, rendered twice — once asking the model to keep what was modelled, once asking it for a visual direction. This is one control, and it is the difference between a render of your scheme and a render of somebody else's.

Your view
Your view
Concrete frame, glazing, tiled floor — and blocks standing in for furniture.
Keep what I modelled
The frame, the glazing and the floor come back as the surfaces you assigned, made real.
Apply a style · Scandinavian
Same layout, same camera — the surfaces are deliberately replaced with timber.

Which one you land on is read off the pixels of your upload rather than asked as a question before you have seen anything: a view that arrives with finishes on it opens on Keep what I modelled, a clay model has none to keep and opens on a style. One tap changes it either way.

And note what did not happen in either version: the placeholder blocks are still blocks. This renders the room you modelled — it does not furnish one you left empty.

Change one thing · verified pair

When the client asks for one change, you change one surface.

Everything outside your selection stays exactly as it was. Inside it, the most predictable result comes from selecting one surface — a splashback, a wall, a worktop face — and keeping fixtures, openings and the corners of the room out of the box. This selection sits on the splashback alone: it stops short of the return wall on the left, of the concrete wall on the right, and of the worktop below.

The parent render of a kitchen, with the brick splashback between worktop and extractor selected for a local edit
01Select the splashback between worktop and extractor, and describe one change.
The same kitchen after the edit: the selected splashback is now a white marble slab, and the worktop, cooktop, cabinets, hood and pendants around it are unchanged
02Change this brick splashback to large-format white marble.
The parent render of a kitchen, with the brick splashback between worktop and extractor selected for a local edit
The same kitchen after the edit: the selected splashback is now a white marble slab, and the worktop, cooktop, cabinets, hood and pendants around it are unchanged

The same two files, enlarged. The worktop edge and the cooktop below, the extractor hood and the four pendants above, and the brick coursing that continues past both ends all sit outside the selection — if the new slab had shifted the wall, none of them would still line up.

Outside the selection: 0 / 2,946,875 pixels changed.Compared at full resolution, pixel by pixel

Which interior surfaces this works on, and which it does not

The selection is a rectangle. On a surface seen close to straight on — a splashback, a wall panel, a run of cabinetry, a headboard wall — its edges are genuinely horizontal and vertical, so the box can sit on them and the change ends where the surface ends. That is the view the pair above is made on.

A rug, a worktop or a floor running away from the camera is a quadrilateral, and no rectangle can bound one of those without collecting the things around it. The model repaints all of what is inside the box, so a box that spans three surfaces comes back with three surfaces reinvented. Until the selection can follow a shape, frame the change against something square-on.

Only the outside is guaranteed. Inside the box, “change this splashback” is a sentence added to the instruction — it asks, it does not lock.

From one render to a workflow

Export, render, compare, revise, version, re-export — in one project.
One project holds the scheme as it evolves — Source v01, the renders and edits made from it, then Source v02 when the room changes and you export the view again. Nothing replaces anything, and every render says which export it came from.

  1. 01

    Export the view

    Frame the perspective you would send a client and export or screenshot it. JPG, PNG or WebP up to 10MB. Eye-level, not a top-down plan.

  2. 02

    Render it

    Arriving from this page the session opens on Interior, on the design-preserving setting, and on the materials choice your view calls for. Say what you want changed, then render.

  3. 03

    Check it against your own drawing

    The result opens beside the view you uploaded with compare already running. Drag the seam and count the things you know: openings, cabinetry runs, the ceiling, where the furniture sits. Or switch to Overlay, which is the one that shows you whether something moved.

  4. 04

    Change one thing

    Drag a box around the one surface the client asked about and describe the change. Every pixel outside your selection is rebuilt from the render it came from, and the result opens compared against it.

  5. 05

    Keep the versions

    Each run adds a version under the source it came from — Render 01, Edit 01 — labelled with the settings that produced it. Nothing overwrites anything, so the image you showed the client on Tuesday is still there on Friday.

  6. 06

    Update the source when the scheme moves on

    Change the room in your modelling tool, export the view again, and add it to the same project with Update source. It becomes Source v02, the settings from your last render carry over, and everything made from the first export stays where it was.

  7. 07

    Export

    Download the full-resolution, watermark-free file on a paid plan. Free previews stay in the Studio.

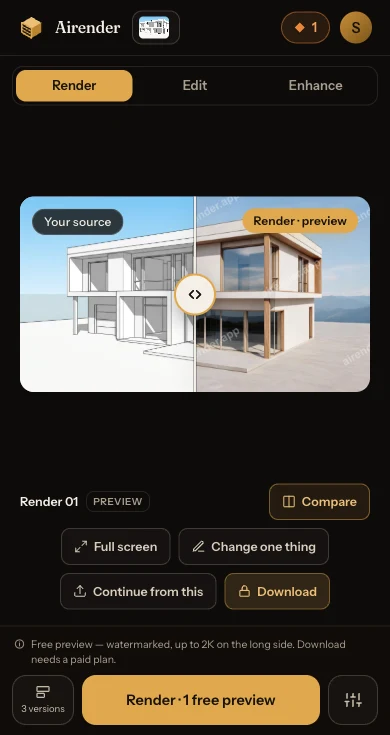
The Airender Studio on a phone: Render, Edit and Enhance tabs, the render on the canvas beside the view it came from, and a bottom bar with 3 versions, the render button and settings
Where the image came from, what you are looking at, and what you can do next. This screenshot is a free account on a model view — not an interior session — but it is the same Studio you land in.
Where Airender fits

This is not a replacement for your renderer. It is for the jobs a renderer is slow at.

Two lists about the work rather than about anyone's product. Nothing below says another tool is worse.

Use Airender when…

  • The room is already designed and you need a still to send
  • The scheme is at the stage where it changes weekly
  • You want to try finishes and moods before committing to a scene setup
  • The revision is one surface, not the whole view
  • You do not want to install, licence or learn a renderer for this job
  • You are working from a laptop, or from someone else’s machine

Use a traditional renderer when…

V-Ray, Corona, Enscape, D5, Twinmotion and the rest

  • Shader-level control over each material matters
  • Photometrically accurate lighting matters — real luminaires, real levels
  • The model is live and the render has to follow it as it changes
  • The client needs to walk through it, in realtime or in VR
  • You need an animation, or frames that match each other exactly
  • It is the hero image, and every part of it has to be art-directed

Those tools are plugged into your model and this one is not — a real disadvantage, and also the reason it needs no install, no seat and no GPU.

Try, deliver, pay

Enough free to run the whole loop on your own room.

The free tier is there to let you judge the workflow, not one image: render your own view, compare it against your drawing, and change one surface. That is what 3 previews are sized for.

Free — 3 previewsno credit card, granted the moment you sign in
  • Standard · 2K only — HD and Ultra need a paid plan
  • Output is watermarked, up to 2K on the long side
  • A render, edit, or enhance uses 1 generation. So a render and one revision leave one over for a retry
  • Previews are for judging, not delivering — Download and commercial use both start with a paid plan
Starter

200 generations / month

$24/mo

or $199 a year, billed annually

Pro

500 generations / month

$49/mo

or $429 a year, billed annually

Studio

1,200 generations / month

$99/mo

or $899 a year, billed annually

Paying unlocks the work you already made — every preview in your project reopens at full resolution, watermark-free. At the annual Studio rate that is $0.06 a generation, cleared for client work, at whichever quality you pick.

See full pricing →
Rights, privacy and getting out
We don’t train on your uploads

Your interior views, prompts and renders are never used to train, fine-tune or improve any model.

You own both sides of it

You keep every right to the view you upload, and paid plans add a worldwide commercial licence for client presentations, proposals and published work.

Deleted when you ask

Ask us to remove a client’s project images — or close the account — and they are gone within 30 days.

7-day money-back

Email us within 7 days of your first subscription payment and we refund it in full, no questions.

FAQ

What interior designers ask before they upload.

01What exactly do I upload?

One image of one interior view: a perspective you exported or screenshotted out of your modelling tool, as a JPG, PNG or WebP up to 10MB. An eye-level or slightly raised perspective is what this is for. A flat top-down floor plan is not — there is no room in it to read, and nothing sensible comes back.

02Do you open native SketchUp, Revit, Rhino, 3ds Max or Blender files?

No — and there is no plugin to install for any of them. Nothing on our side sees your .skp, .rvt, .3dm, .max or .blend file, your layers, your components, your families or your material assignments. It sees the pixels of the view you exported. That is also why the version you are on does not matter, and why Mac and Windows are the same.

03Will my walls, openings and camera stay where they are?

That is what the Preserve design setting is for: it asks the model to hold your layout, wall and door openings, proportions and camera angle while materials, lighting and realism change. Designed to preserve the visible structure. Always compare the result with your original design. It is an instruction, not a lock on your drawing — which is why the compare slider is on by default and why the example above says what it got wrong. On the camera specifically: Camera defaults to Auto, which adds nothing to the prompt at all. That is the right default for a view you framed yourself.

04My model already has the finishes I specified. Will it repaint them?

Only if you ask it to. Materials is a two-button choice above the render button, and a view that arrives already textured opens on “Keep what I modelled”, decided from the image rather than from a question we made you answer. That setting asks the render to match the floor, wall and ceiling surfaces already in the view rather than substitute a palette. Choosing a style is the deliberate opposite, and the panel says so before you spend anything.

05What if the model is still clay — no materials on it yet?

Then there is nothing to keep, and it opens on a style instead. One thing to know before you spend a preview on it: this renders the room you modelled, it does not furnish one you left empty. A space with placeholder blocks in it comes back with the blocks rendered as blocks. If you want furniture in the picture, it has to be in the view you upload.

06The client wants one thing changed. Do I re-render the whole room?

No. Draw a box around the surface on the finished render, describe the change, and only that area is repainted — every pixel outside your selection is rebuilt from the render it came from. The result arrives as a new version under the original, which stays exactly as it was. The selection is a rectangle, which decides a lot about where this works indoors; that is argued above, beside the pair it is argued on.

07I went back and changed the model. Do I start a new project?

No. Export the updated view and add it with Update source: it goes into the SAME project as Source v02, and the settings from your last render carry over. Two things are deliberately not carried: the edit rectangle, because a box drawn on one image means nothing on another; and any promise that the second render will look like the first.

08Can I get several views of the same room to match each other?

Not reliably, and it would be easy to imply otherwise. Each view is rendered on its own, and running two views on the same settings is not the same thing as reproducing a look across them — generation is non-deterministic, so even one view run twice comes back different. What you can do today is run each view, compare each against its own source, and use Edit to bring a surface into line. A real multi-view consistency feature is not built, and until it is, nothing here will claim it.

09What can I actually download?

Standard · 2K, HD · 4K or Ultra · 5K, watermark-free, on a paid plan. Those are pixel budgets we ask the model for, not fixed frames — the shape of what comes back is its decision, so we do not promise the output keeps your upload's aspect ratio. Free previews are watermarked, up to 2K on the long side, at Standard · 2K only, and they stay in the Studio. See full pricing →

010Can I use the renders in client work?

Yes, on a paid plan. Every paid plan includes a worldwide commercial licence to use your renders in client presentations, proposals, competition boards and published work, and you keep every right to the view you uploaded. Free previews are watermarked, cannot be downloaded, and carry no commercial licence — they are for judging the result, not delivering it. Read the terms →

011These are client projects. Where do the images live, and are they used to train anything?

They are never used to train, fine-tune or improve any model — not your uploads, not your prompts, not your outputs. Uploads are encrypted in transit and at rest and your renders are stored in your account so you can come back to them; to produce a render the image is sent to our rendering provider (fal.ai), who is named in the sub-processor list. Ask us to delete your uploads and renders, or close the account, and they are removed within 30 days. Read the privacy notice →

012When should I still use V-Ray, Enscape or another traditional renderer?

Whenever the job needs what a renderer plugged into your model can do and an image of one view cannot — shader-level material control, photometric lighting, a scene that follows the model, a walkthrough, animation, or a fully art-directed hero image. The two lists above split it job by job. Those tools read your model and this does not: a real disadvantage, and also why this needs no install, no seat and no GPU.

Weighing the category rather than the room? See AI architectural rendering software.

An interior model view rendered with Airender

The interior worth judging this on is your own.

Export the view you have open, render it, and check it against your own drawing — 3 free previews, no card.

Render my interior view
3 free previews
No credit card
Commercial use on paid plans